
An example to configure GRE over IPSEC
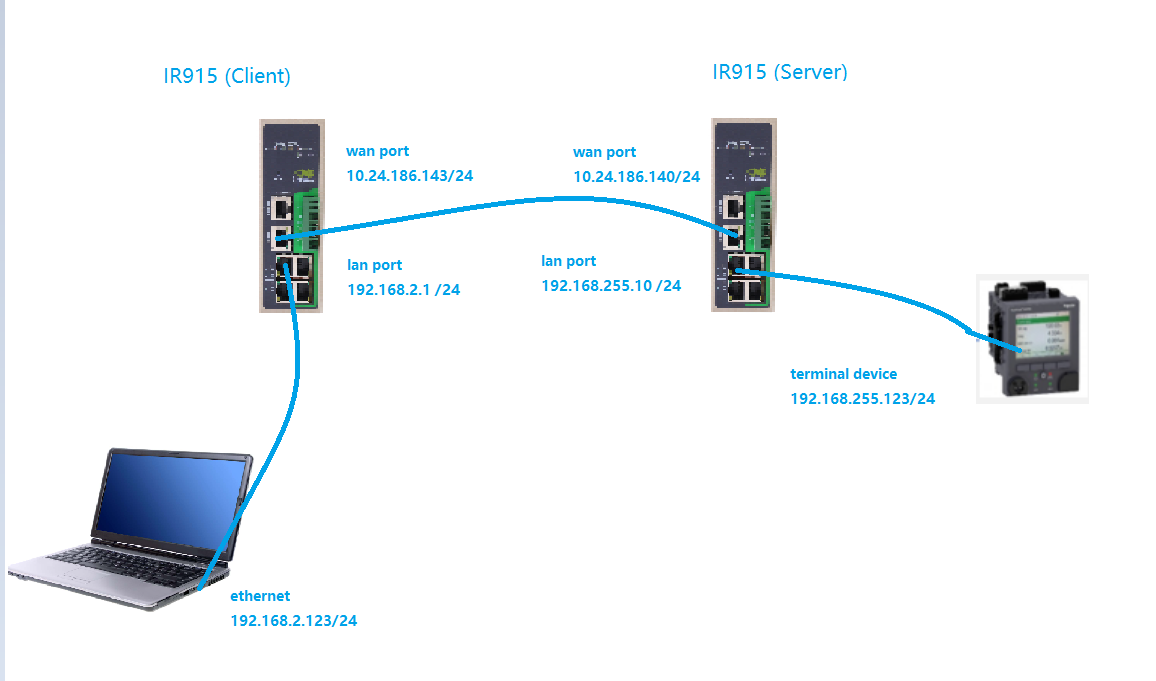
In this example, we give a very simple topology to make you easily understand how to configure GRE over IPSEC
The topology after simplifying
Configuration
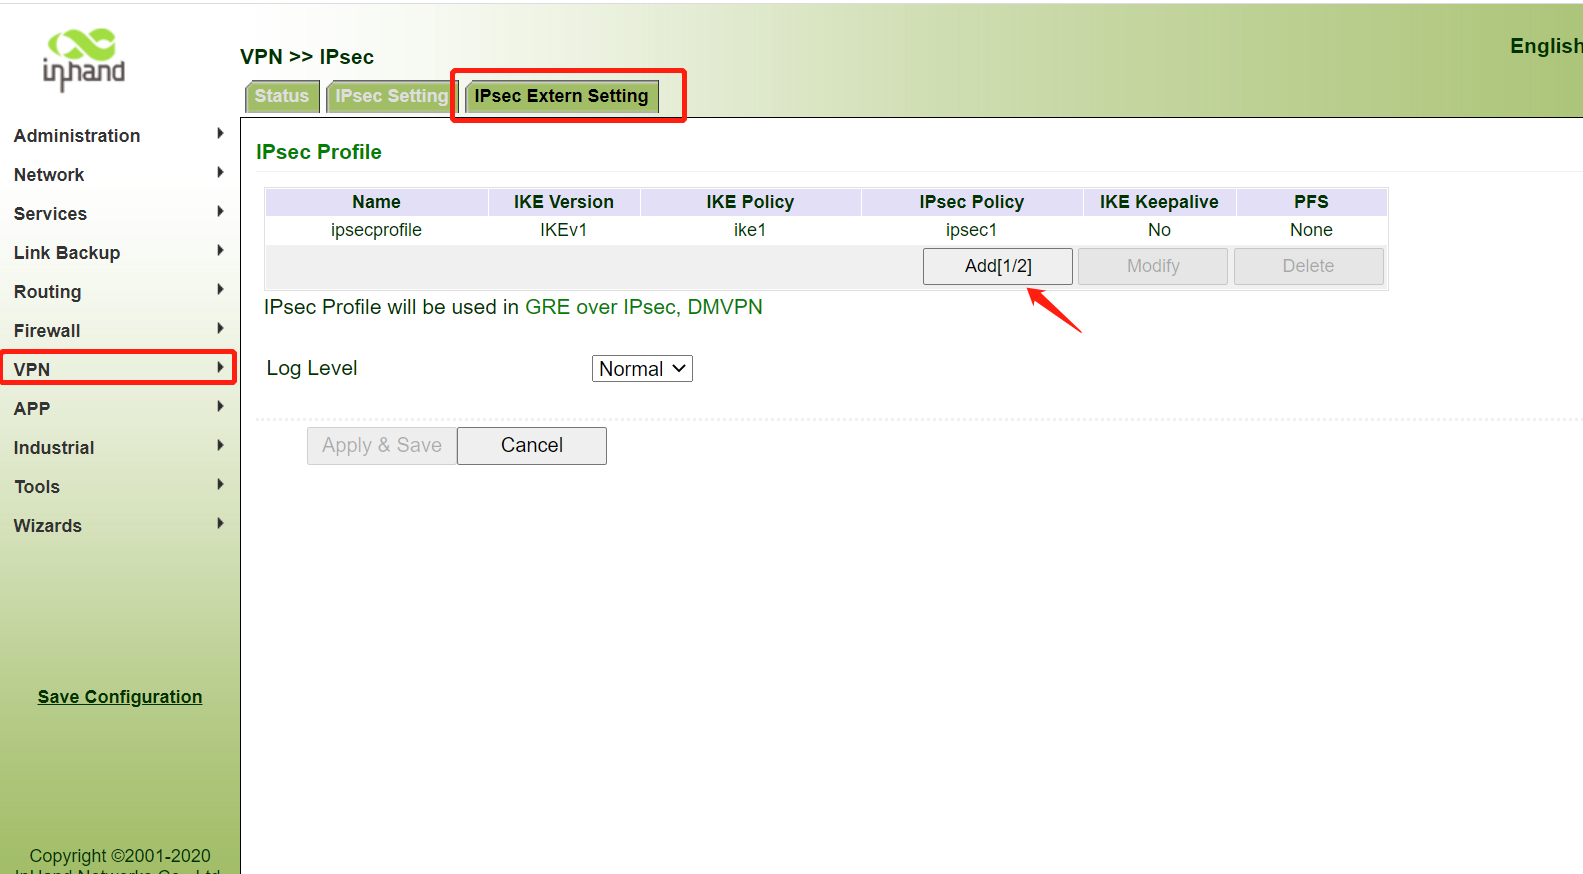
Step 1: Set IPsec
extern profile and configure GRE first
Enable IPsec
function, according to your needs to create the profiles of IKE and IPsec policy
function, according to your needs to create the profiles of IKE and IPsec policy
Note:
The profiles only take effect after clicking Apply
& Save.

Server Config
Client Config
Set IPsec
Extern profile

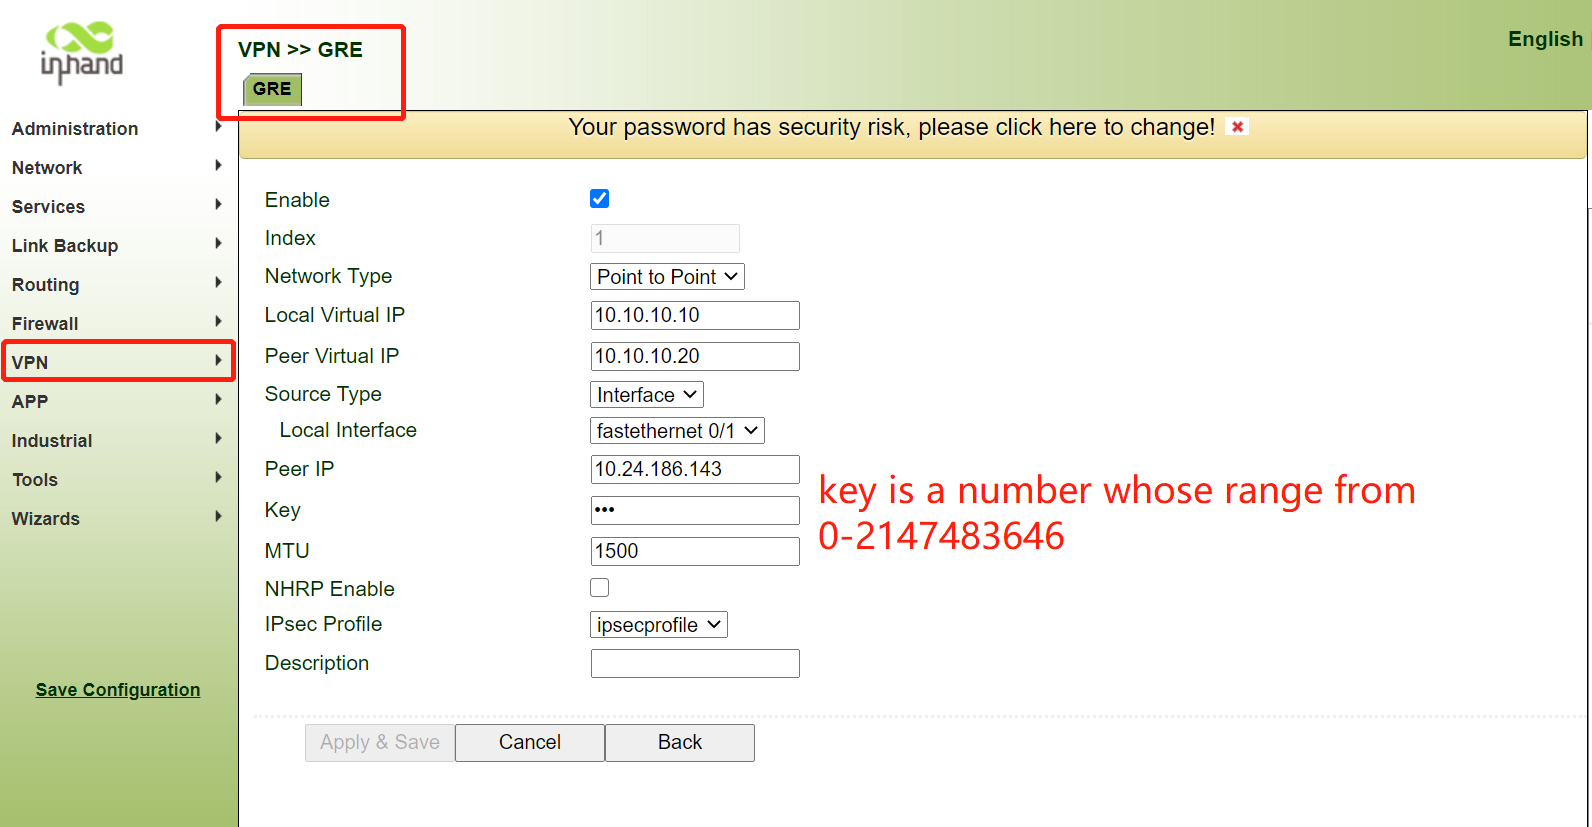
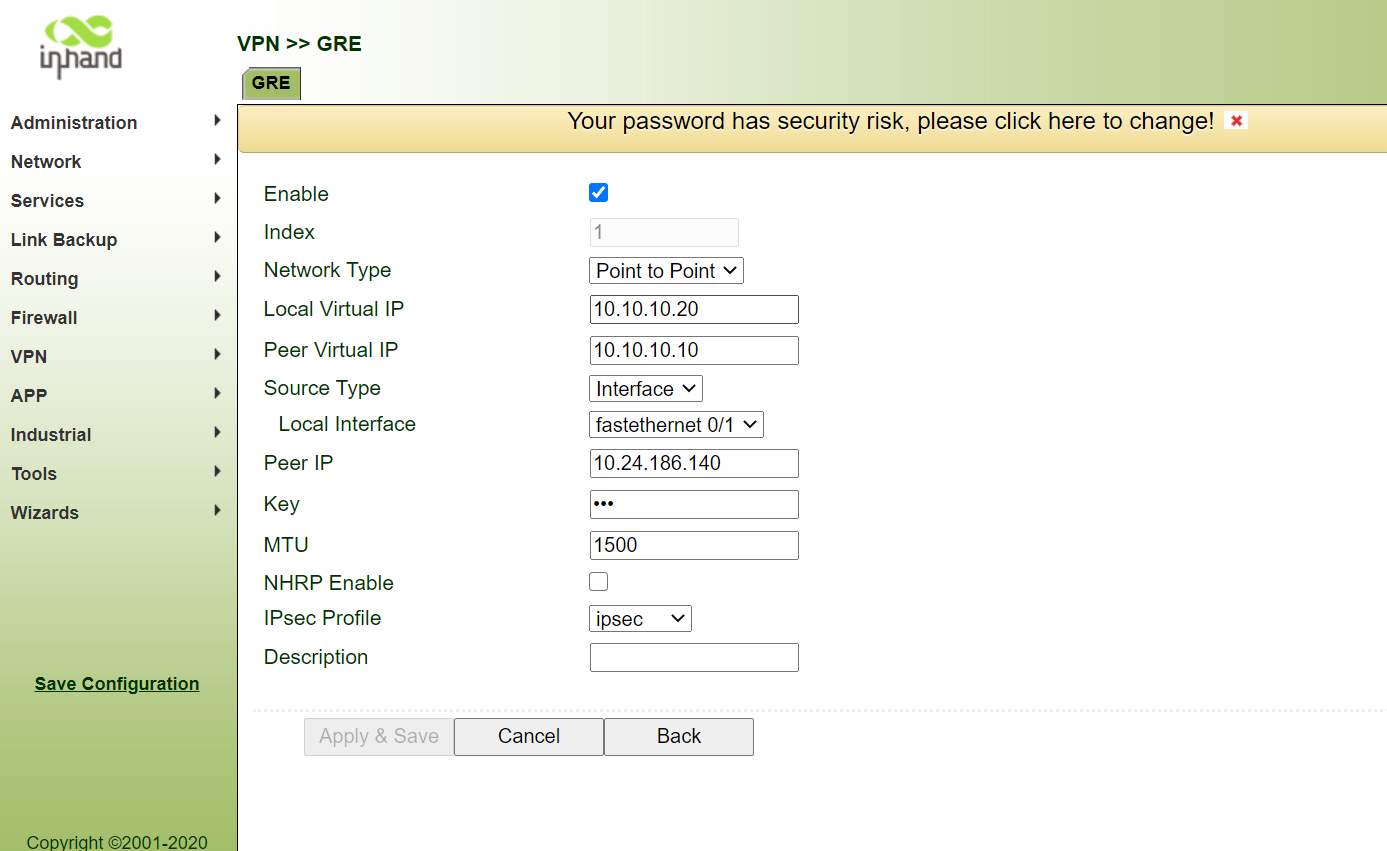
GRE Configuration:
Note:
The key
parameters in the GRE configuration and IPsec do not affect each other
independently, which can be set differently.
Server
Configuration
Client
Configuration
Configuration
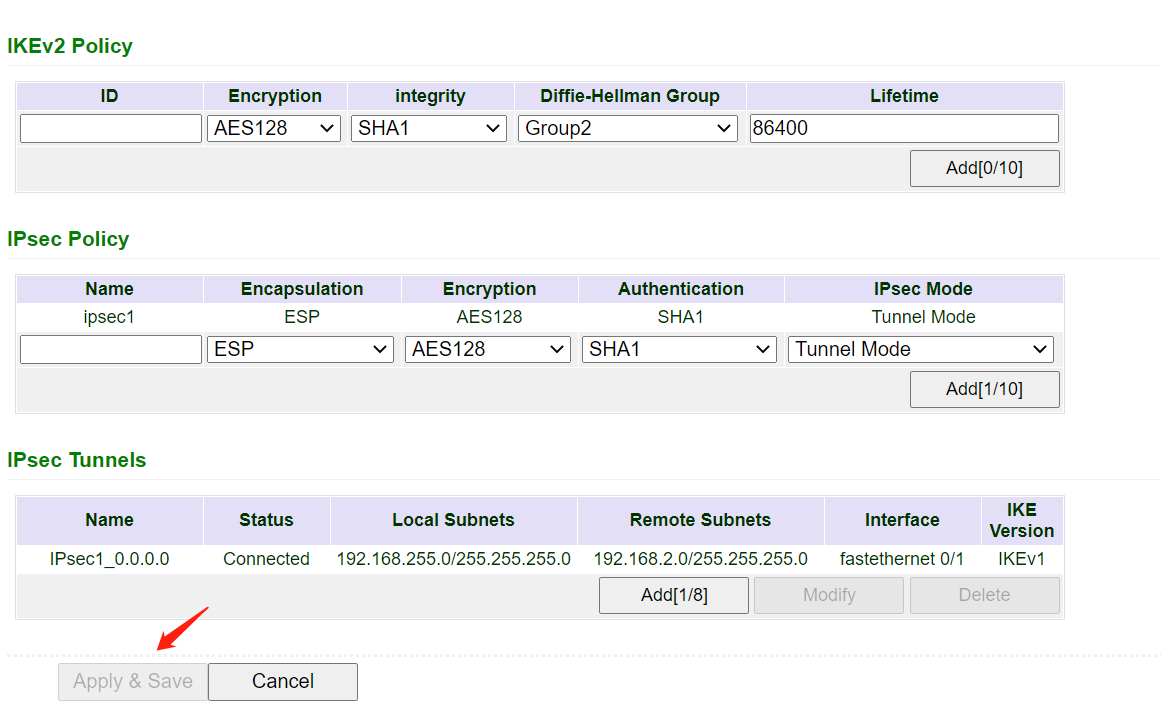
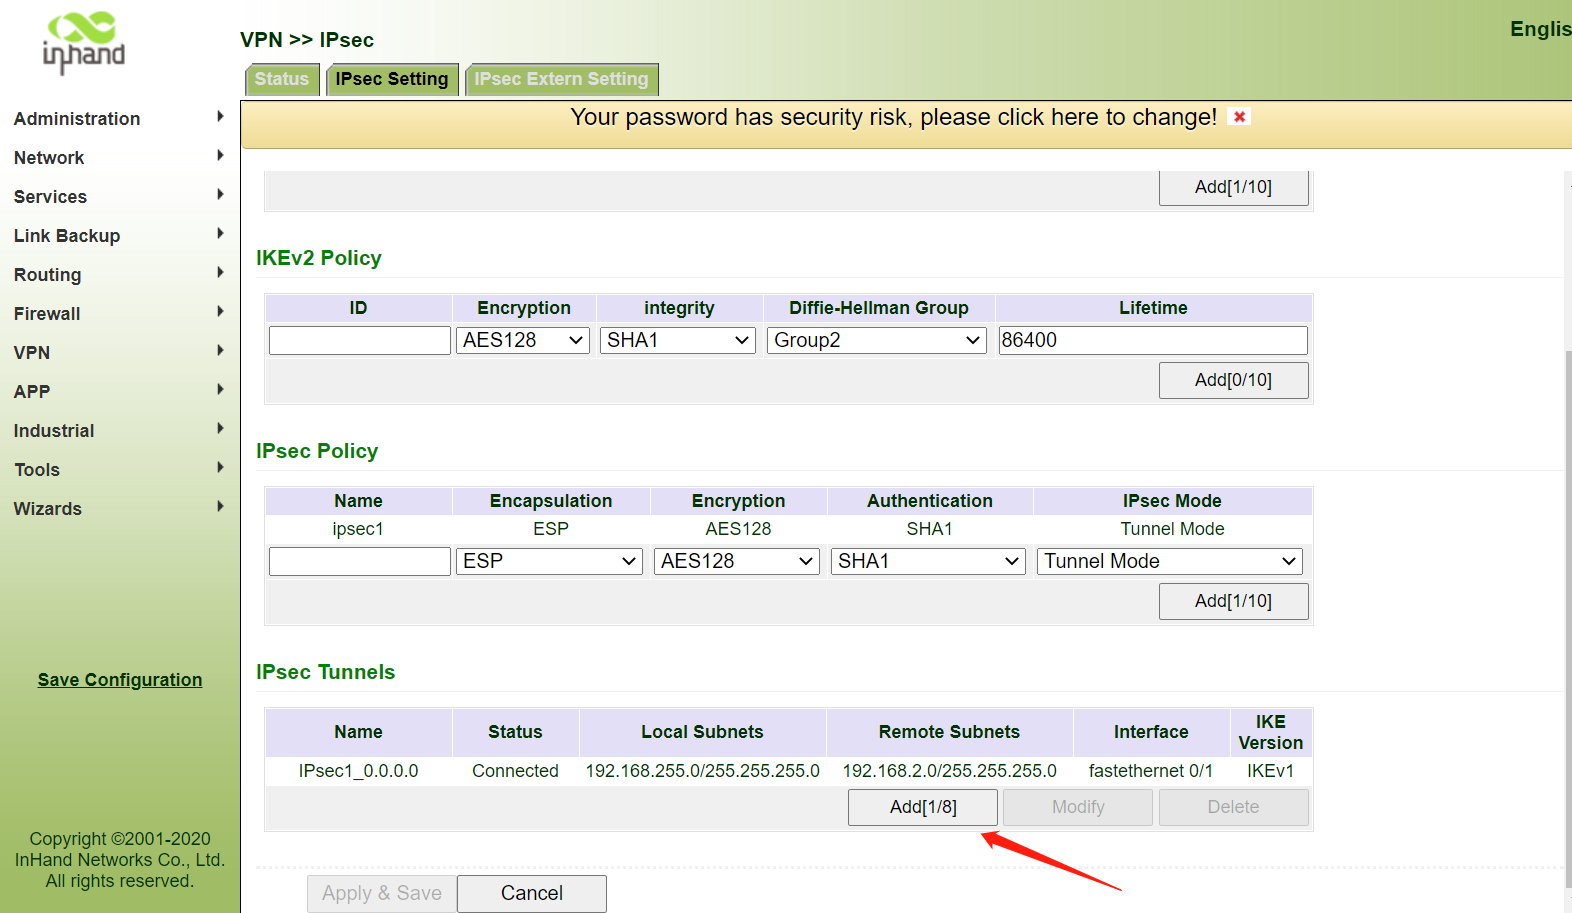
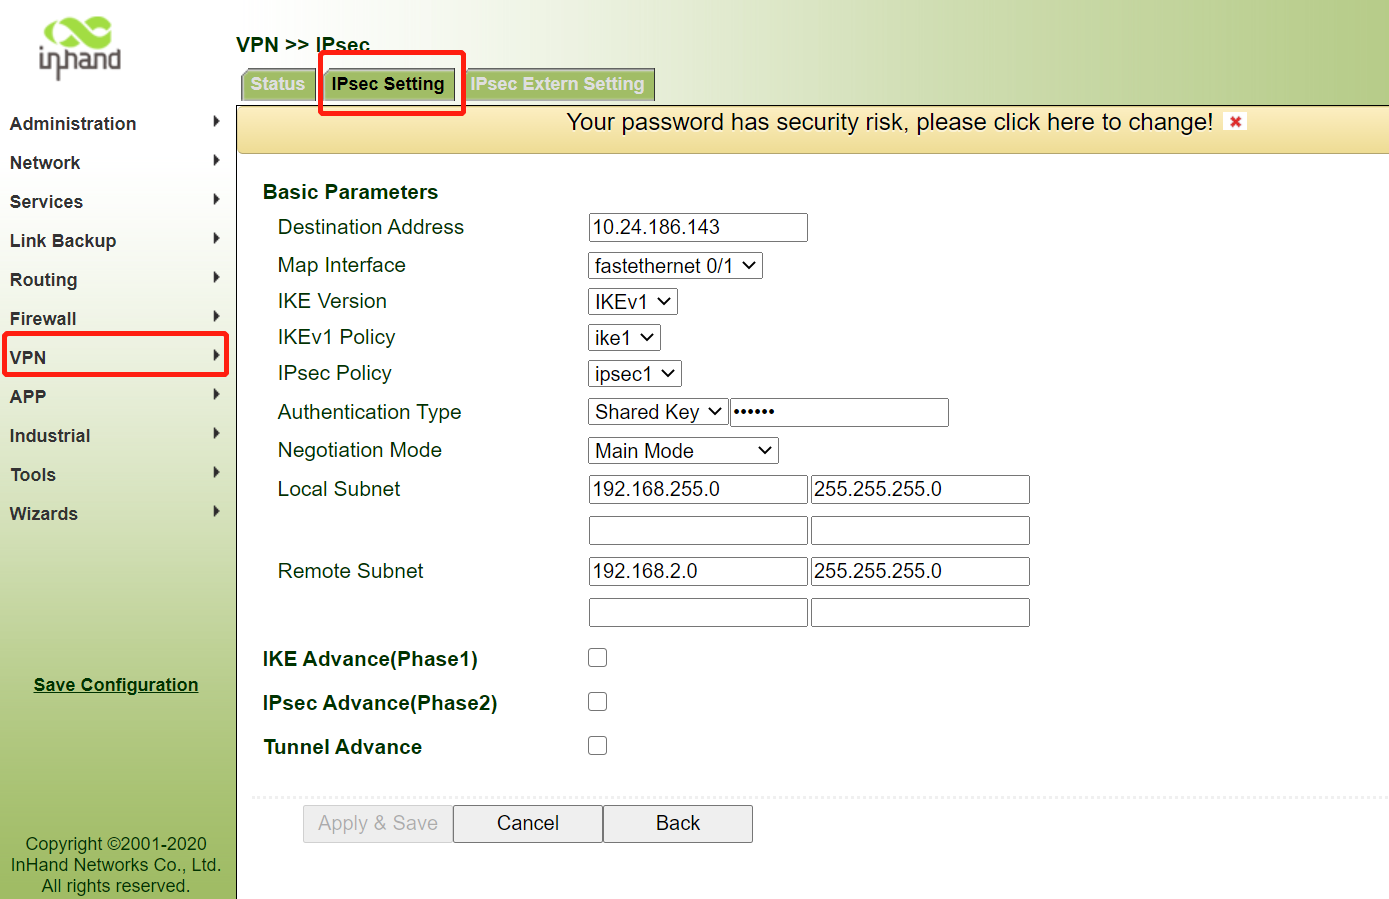
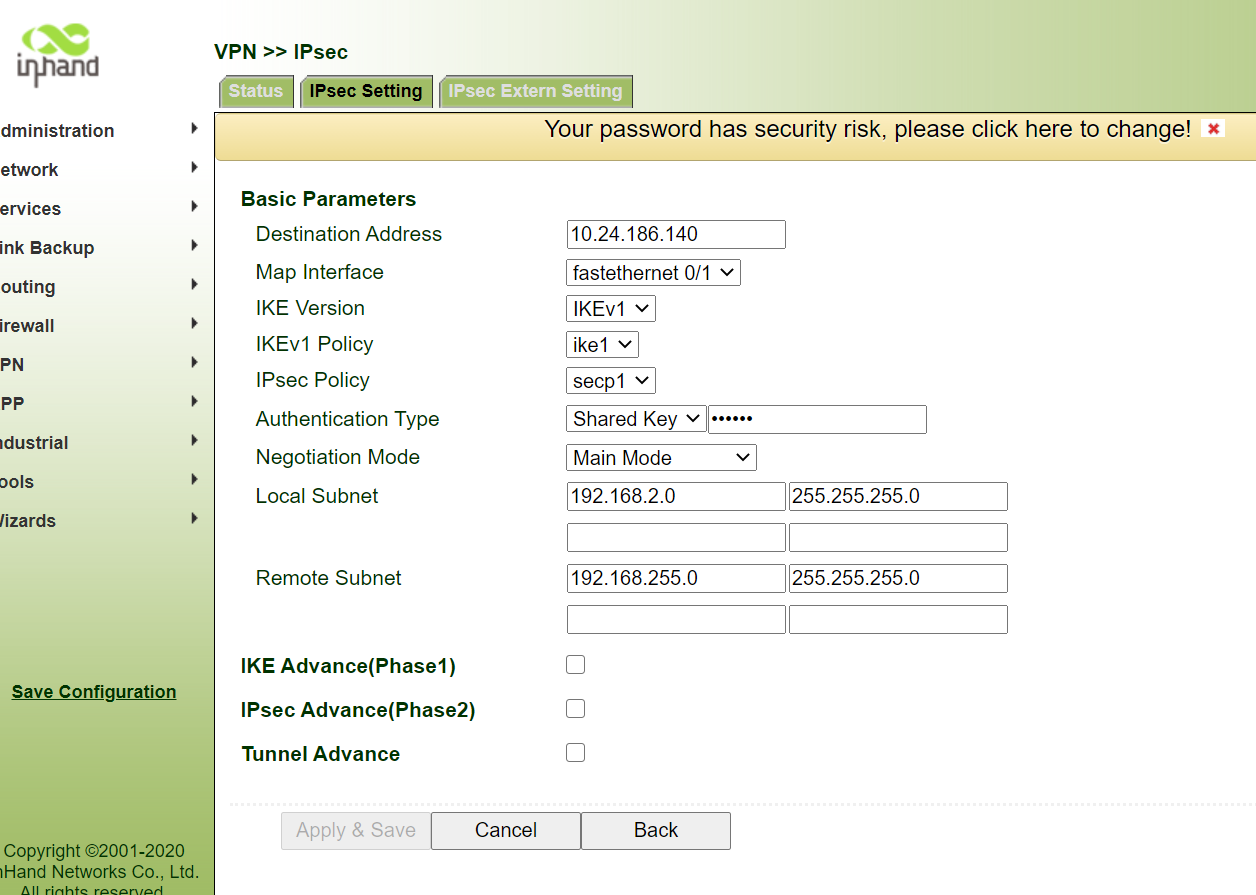
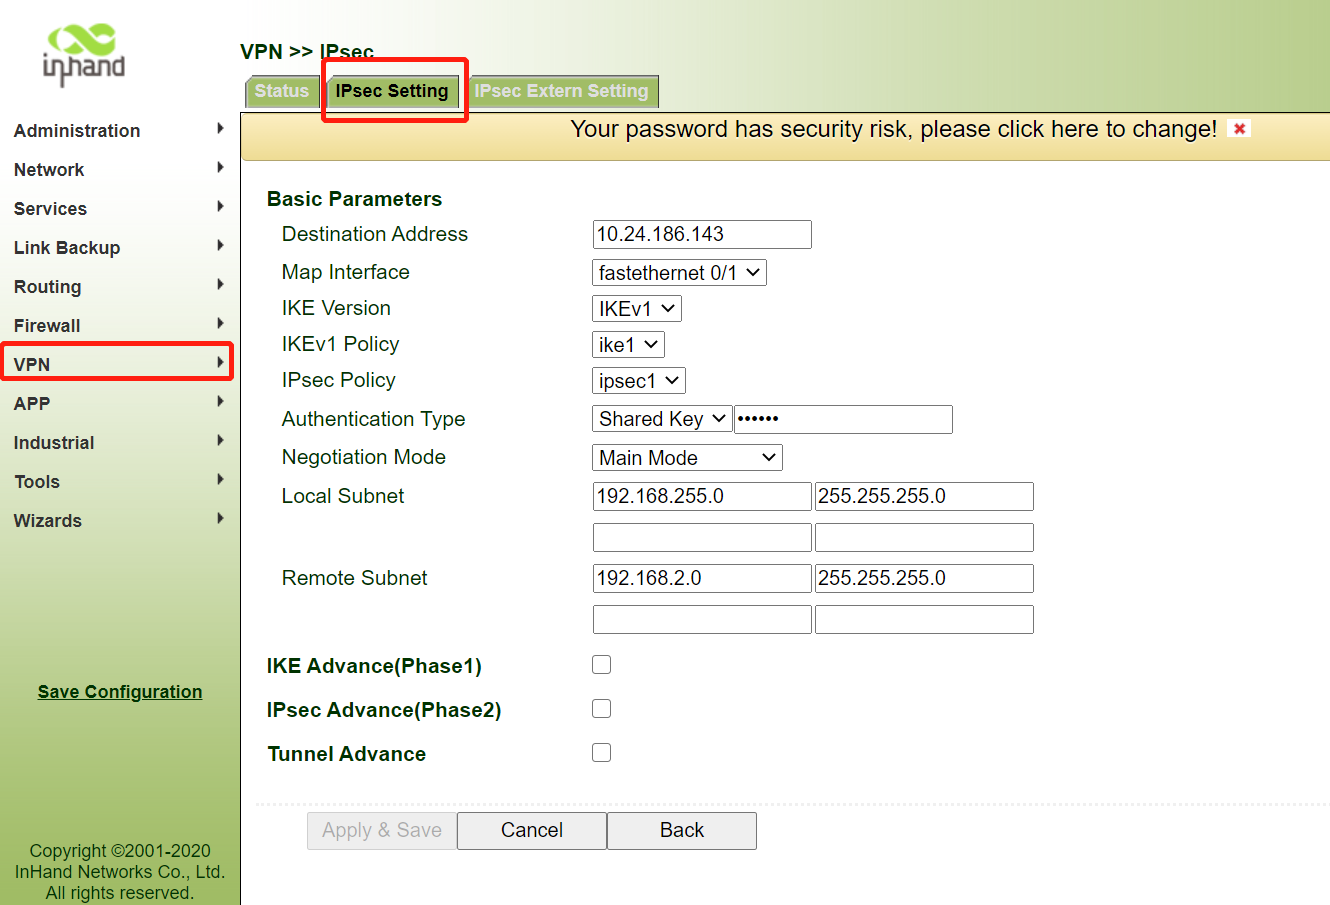
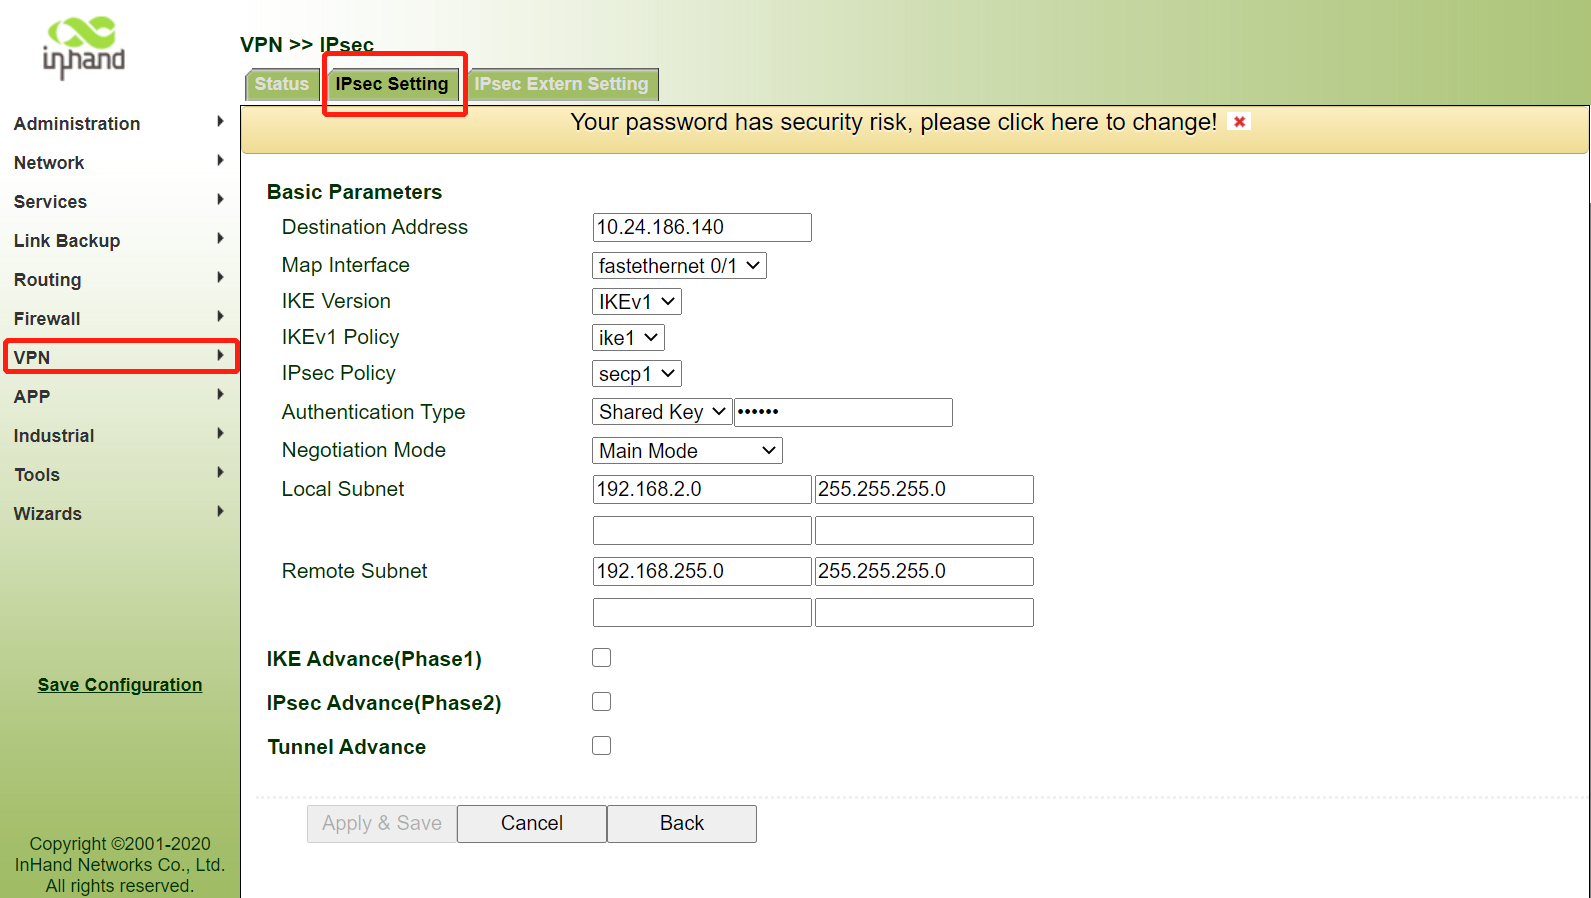
Step 2 Configure IPsec
Tunnels parameters
For
example,
If your
local network IP address is
192.168.255.0/24
Remote network
IP address is
192.168.2.0/24
The following example instructs you on how to set the parameters.
Server
Configuration:
Client
Configuration
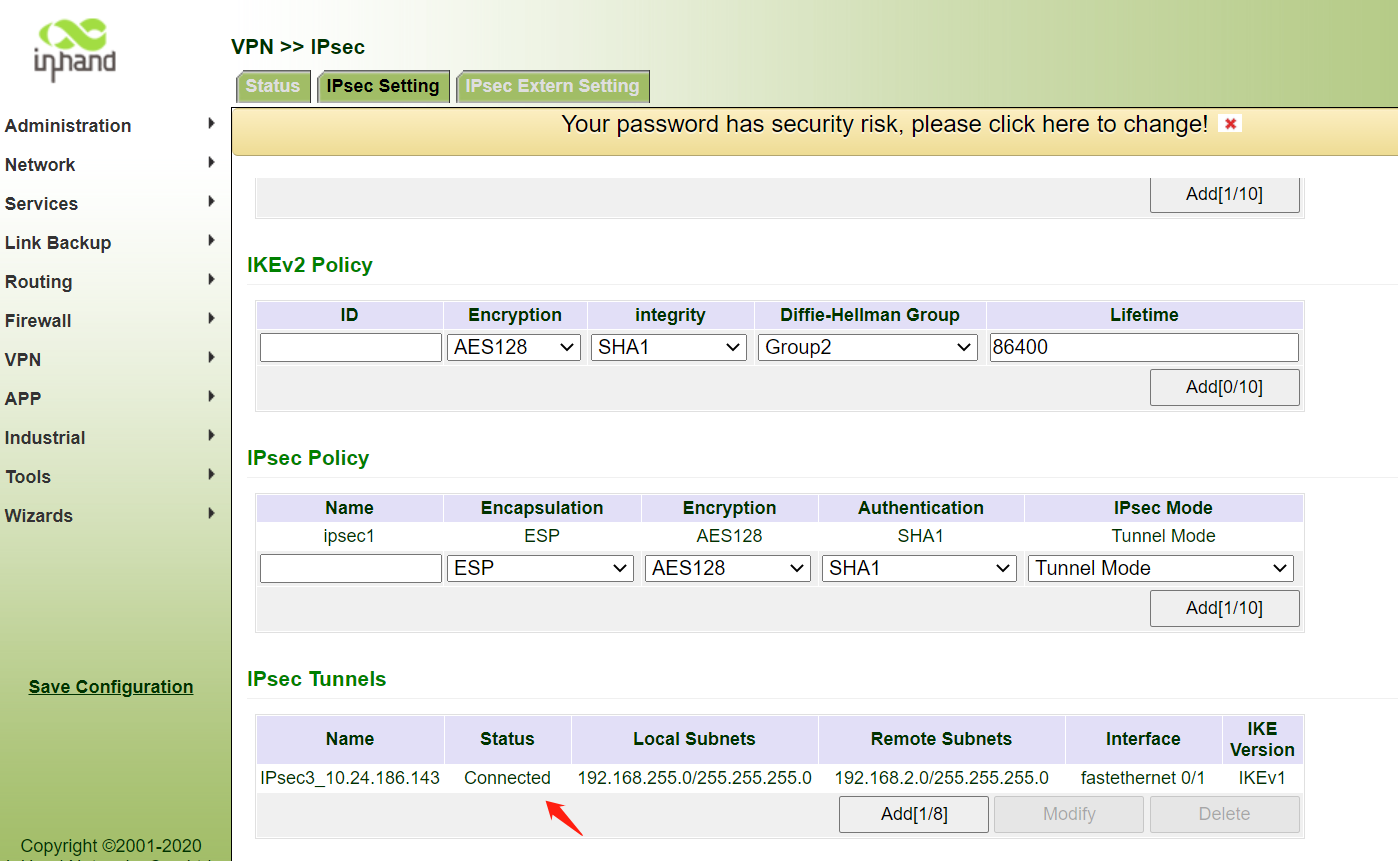
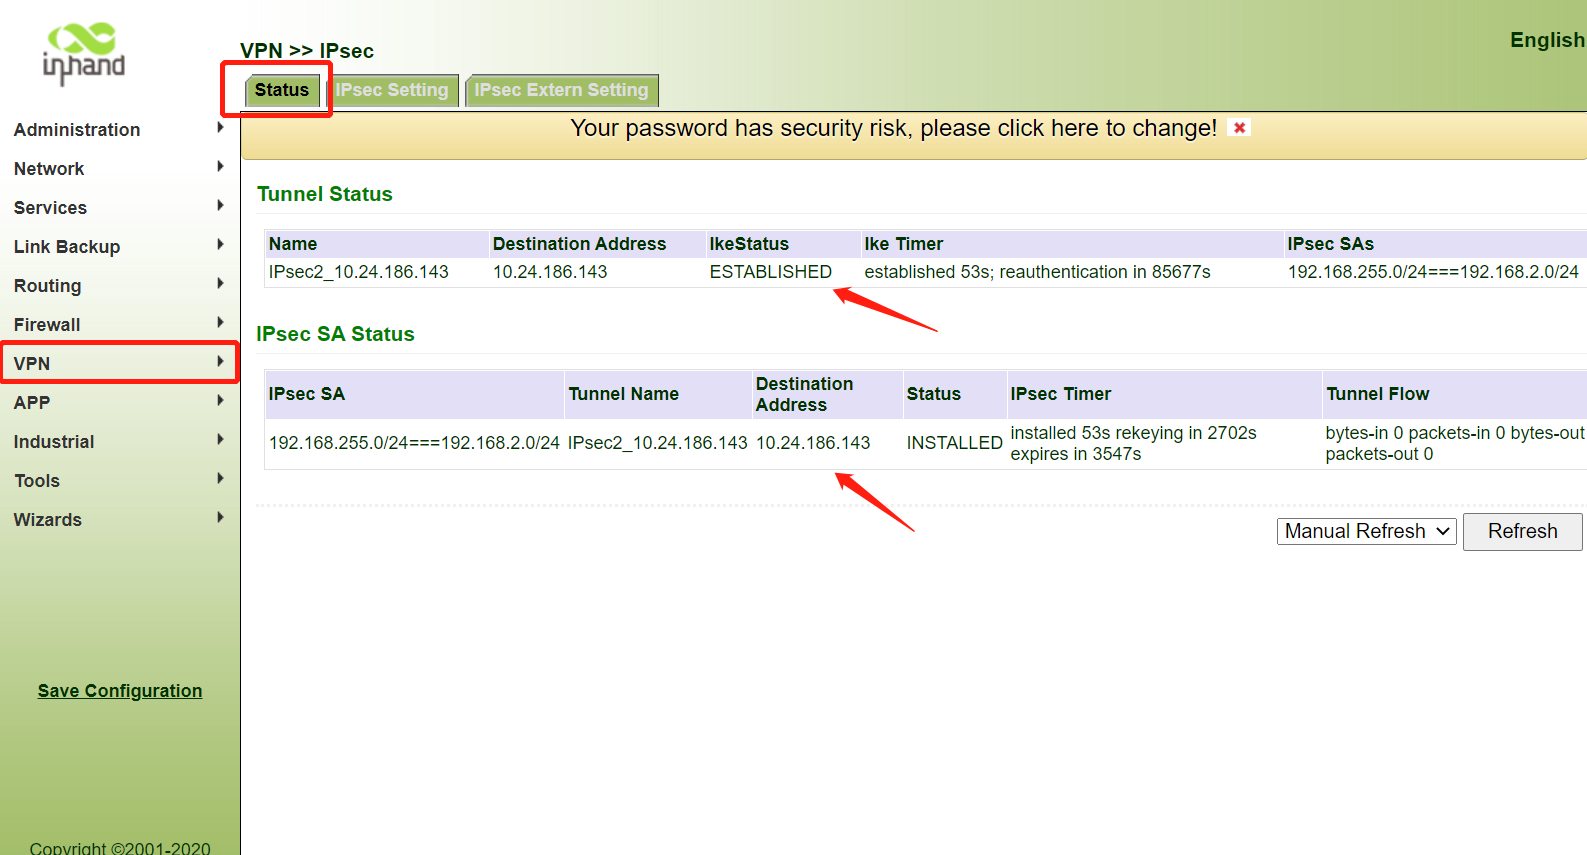
Check the
status of the tunnel
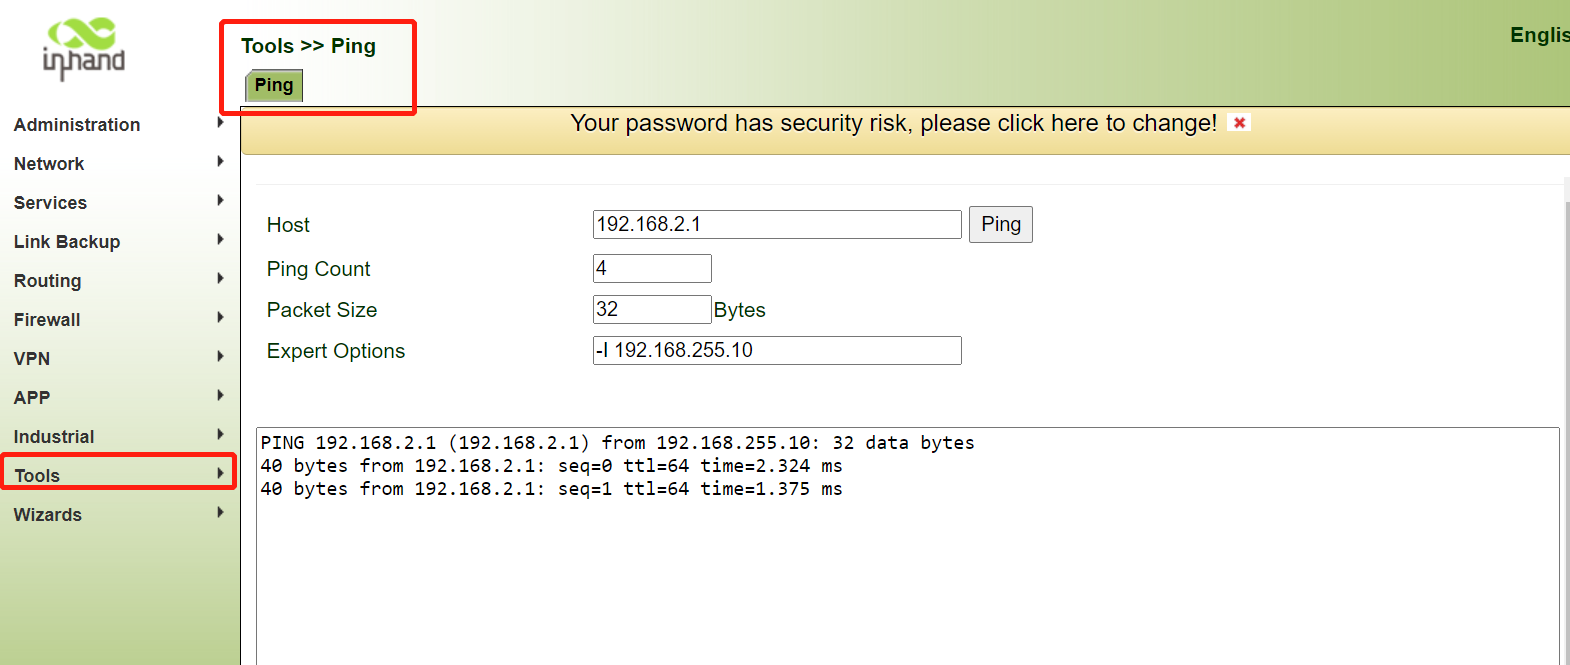
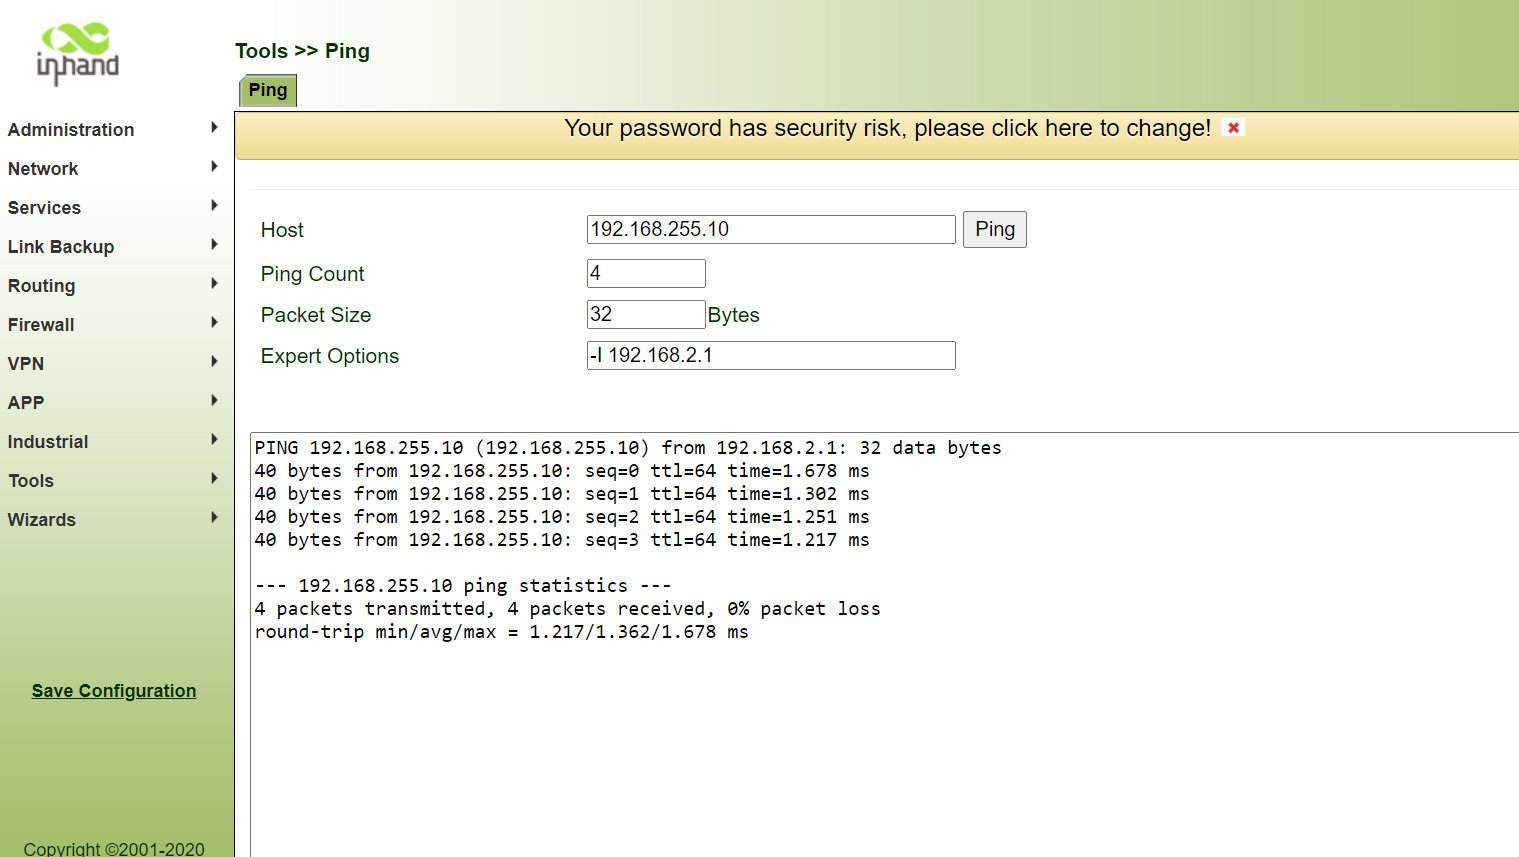
Step 3 Verify the VPN connection between Server and Client
Local LAN
ping Remote LAN (Server ping Client)
Remote LAN
ping Local LAN (Client ping Server)
0 comments
To reply to the article, please Login or registered